Remove contamination and host reads
| Author(s) |
|
| Reviewers |
|
OverviewQuestions:
Objectives:
What preprocessing steps are required to obtain cleaned reads for downstream analysis?
How can we identify and remove contaminant or host-derived reads from raw sequencing data?
Requirements:
Identify reads originating from contaminants or host genomes.
Remove those reads to produce high-quality, clean metagenomic data suitable for downstream analyses.
Time estimation: 1 hourLevel: Introductory IntroductorySupporting Materials:Published: Dec 18, 2025Last modification: May 12, 2026License: Tutorial Content is licensed under Creative Commons Attribution 4.0 International License. The GTN Framework is licensed under MITpurl PURL: https://gxy.io/GTN:T00568rating Rating: 4.5 (2 recent ratings, 3 all time)version Revision: 3
Metagenomic sequencing captures all DNA present in a sample, including the microbial community, host DNA, and potential environmental or external contaminants (such as human DNA introduced during sample handling or sequencing).
Before performing taxonomic or functional analysis, it is essential to remove these host-drived or contaminant reads to avoid misleading downstream interpretations.
In this tutorial, we will learn how to identify and remove host or contaminant reads using Galaxy. We will:
- Map raw reads to a host reference genome using Bowtie2 and extract unmapped reads.
- Repeat the process with unmapped reads against a human reference genome to remove potential human contamination.
- Generate a final set of clean, non-host reads suitable for downstream analyses such as assembly, binning, or profiling.
To test and illustrate the process, we use bee gut metagenome samples and focus on filtering out both host (bee) sequences and potential human contamination from the reads.
AgendaIn this tutorial, we will cover:
Prepare Galaxy and data
Any analysis should get its own Galaxy history. So let’s start by creating a new one:
Hands On: Data Upload
Create a new history for this tutorial
To create a new history simply click the new-history icon at the top of the history panel:
Rename the history
- Click on galaxy-pencil (Edit) next to the history name (which by default is “Unnamed history”)
- Type the new name
- Click on Save
- To cancel renaming, click the galaxy-undo “Cancel” button
If you do not have the galaxy-pencil (Edit) next to the history name (which can be the case if you are using an older version of Galaxy) do the following:
- Click on Unnamed history (or the current name of the history) (Click to rename history) at the top of your history panel
- Type the new name
- Press Enter

Now, we need to import the data
Hands On: Import datasets
Import the files from Zenodo or from the shared data library:
https://zenodo.org/records/17829290/files/SRR24759598_1.fastq.gz
https://zenodo.org/records/17829290/files/SRR24759598_2.fastq.gz
https://zenodo.org/records/17829290/files/SRR24759616_1.fastq.gz
https://zenodo.org/records/17829290/files/SRR24759616_2.fastq.gz
- Copy the link location
Click galaxy-upload Upload at the top of the activity panel
- Select galaxy-wf-edit Paste/Fetch Data
Paste the link(s) into the text field
Press Start
- Close the window
As an alternative to uploading the data from a URL or your computer, the files may also have been made available from a shared data library:
- Go into Libraries (left panel)
- Navigate to the correct folder as indicated by your instructor.
- On most Galaxies tutorial data will be provided in a folder named GTN - Material –> Topic Name -> Tutorial Name.
- Select the desired files
- Click on Add to History galaxy-dropdown near the top and select as Datasets from the dropdown menu
In the pop-up window, choose
- “Select history”: the history you want to import the data to (or create a new one)
- Click on Import
Create a paired collection named ‘Raw reads’ that includes both pairs.
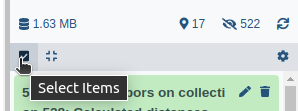
- Click on galaxy-selector Select Items at the top of the history panel
- Check all the datasets in your history you would like to include
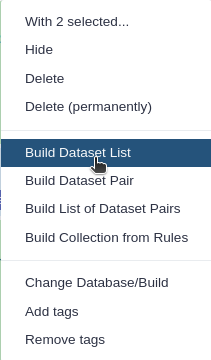
Click n of N selected and choose Advanced Build List
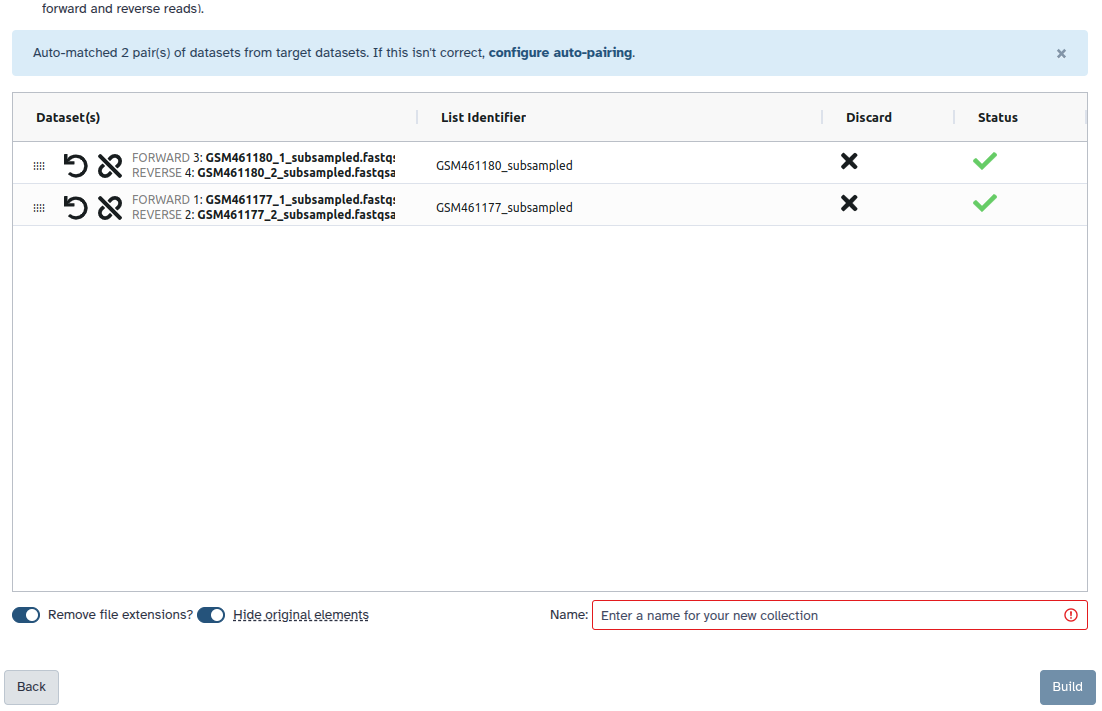
You are in the collection building wizard. Choose List of Paired Datasets and click ‘Next’ button at the right bottom corner.
Check and configure auto-pairing. Commonly matepairs have suffix
_1and_2or_R1and_R2. Click on ‘Next’ at the bottom.
- Edit the List Identifier as required.
- Enter a name for your collection
- Click Build to build your collection
- Click on the checkmark icon at the top of your history again


Map reads to a host genome with Bowtie2
To remove host contamination, we start by mapping the reads to the host genome using Bowtie2 to detect and remove host-derived sequences.
Hands On: Remove host reads
- Bowtie2 ( Galaxy version 2.5.3+galaxy1) with the following parameters:
- “Is this single or paired library”:
Paired-end Dataset Collection
- param-collection “FASTQ Paired Dataset”:
Input reads- “Write unaligned reads (in fastq format) to separate file(s)”:
Yes- “Do you want to set paired-end options?”:
Yes- “Will you select a reference genome from your history or use a built-in index?”:
Use a built-in genome index
- “Select reference genome”:
A. mellifera genome (apiMel3, Baylor HGSC Amel_3.0)- “Set read groups information?”:
Do not set- “Select analysis mode”:
1: Default setting only- “Do you want to tweak SAM/BAM Options?”:
No- “Save the bowtie2 mapping statistics to the history”:
Yes- Run the tool. The outputs will include:
- Mapping statistics report (
bowtie2.log)- Unaligned (unmapped) forward and reverse reads
- These unmapped reads represent sequences not belonging to the host and will be used in the next step.
Comment: TipHost reference genomes vary depending on the study organism. You can upload a FASTA file of your host genome if it is not available as a built-in index.
Re-pair unmapped reads
We now combine the unmapped forward and reverse reads into a new paired-end dataset for further processing.
Hands On: Combine unmapped forward and reverse reads into a paired collection
- Zip collections with the following parameters:
- param-file “Input 1”:
output_unaligned_reads_l- param-file “Input 2”:
output_unaligned_reads_r
- This step creates a new paired-end collection that represents all reads not aligned to the host genome. Rename this output collection to ‘Reads without bee reads’
Comment: NoteZipping restores the normal paired-end structure, which is required for downstream tools or for rerunning the workflow on another reference.
Summarize mapping statistics
Once the host mapping is complete, we use MultiQC to summarize and visualize the mapping statistics, helping us assess how many reads were removed and how many remain.
Hands On: Evaluate host read removal results
- MultiQC ( Galaxy version 1.27+galaxy3) with the following parameters:
- In “Results”:
- param-repeat “Insert Results”
- “Which tool was used generate logs?”:
Bowtie 2
- param-file “Output of Bowtie 2”:
mapping_stats(output of Bowtie2 tool)- “Report title”:
Host Removal- Run the tool and open the generated HTML report.
Review the mapping percentage, number of reads aligned, and number of unmapped reads.
Comment: TipLow mapping percentages in the report confirm that most host reads were successfully removed.
Question
- What percentage of reads mapped to the bee reference genome?
- What percentage of reads were removed?
- 2.8% for SRR24759598 and 1.1% for SRR24759616.
- 2.8% for SRR24759598 and 1.1% for SRR24759616.
Remove potential human contamination
After removing host reads, we can run the same workflow again to eliminate possible human contamination that may remain in the dataset.
Hands On: Rerun the workflow using the human genome as reference
- Use the unmapped reads Reads without bee reads as the input for this second run.
- In the Bowtie2 step:
- “Will you select a reference genome from your history or use a built-in index?”:
Use a built-in genome index- “Select reference genome”:
Human (GRCh38)- Keep all other parameters the same as in the first run.
- Continue through the Zip collections and MultiQC steps as before.
The output of this second run represents your final cleaned reads, free from both host and human sequences. Rename this collection to ‘Clean metagenomic reads’
Comment: NoteRerunning the same workflow maintains reproducibility. Only the reference genome and the input data change between the two runs.
Question: Verify your final dataset
- How does the mapping percentage differ between the host and human filtering runs?
- How many reads have been removed?
- The second run (against the human genome) usually removes only a small number of additional reads.
- 0.1% in both samples.
Conclusion
In this tutorial, you learned how to:
- Identify and remove reads originating from host or contaminant genomes using Bowtie2.
- Combine unmapped forward and reverse reads into a paired collection for reuse.
- Summarize mapping statistics and verify host-read removal using MultiQC.
- Rerun the same workflow with a human reference genome to remove residual human contamination.
The resulting clean reads are now ready for downstream metagenomic analyses such as:
- Assembly
- Binning
- Functional or taxonomic profiling
These preprocessing steps are essential to ensure accurate microbial community reconstruction without interference from host DNA.
You've Finished the Tutorial
Key points
Identifying and removing contaminant and host reads is a critical preprocessing step in metagenomic workflows.
Clean reads improve the accuracy of downstream assembly, binning, and taxonomic profiling.
Frequently Asked Questions
Have questions about this tutorial? Have a look at the available FAQ pages and support channelsUseful literature
Further information, including links to documentation and original publications, regarding the tools, analysis techniques and the interpretation of results described in this tutorial can be found here.
Feedback
Did you use this material as an instructor? Feel free to give us feedback on how it went.
Did you use this material as a learner or student? Click the form below to leave feedback.

Citing this Tutorial
- Mina Hojat Ansari, Bérénice Batut, Remove contamination and host reads (Galaxy Training Materials). https://training.galaxyproject.org/training-material/topics/microbiome/tutorials/host-removal/tutorial.html Online; accessed TODAY
- Hiltemann, Saskia, Rasche, Helena et al., 2023 Galaxy Training: A Powerful Framework for Teaching! PLOS Computational Biology 10.1371/journal.pcbi.1010752
- Batut et al., 2018 Community-Driven Data Analysis Training for Biology Cell Systems 10.1016/j.cels.2018.05.012
Congratulations on successfully completing this tutorial!@misc{microbiome-host-removal, author = "Mina Hojat Ansari and Bérénice Batut", title = "Remove contamination and host reads (Galaxy Training Materials)", year = "", month = "", day = "", url = "\url{https://training.galaxyproject.org/training-material/topics/microbiome/tutorials/host-removal/tutorial.html}", note = "[Online; accessed TODAY]" } @article{Hiltemann_2023, doi = {10.1371/journal.pcbi.1010752}, url = {https://doi.org/10.1371%2Fjournal.pcbi.1010752}, year = 2023, month = {jan}, publisher = {Public Library of Science ({PLoS})}, volume = {19}, number = {1}, pages = {e1010752}, author = {Saskia Hiltemann and Helena Rasche and Simon Gladman and Hans-Rudolf Hotz and Delphine Larivi{\`{e}}re and Daniel Blankenberg and Pratik D. Jagtap and Thomas Wollmann and Anthony Bretaudeau and Nadia Gou{\'{e}} and Timothy J. Griffin and Coline Royaux and Yvan Le Bras and Subina Mehta and Anna Syme and Frederik Coppens and Bert Droesbeke and Nicola Soranzo and Wendi Bacon and Fotis Psomopoulos and Crist{\'{o}}bal Gallardo-Alba and John Davis and Melanie Christine Föll and Matthias Fahrner and Maria A. Doyle and Beatriz Serrano-Solano and Anne Claire Fouilloux and Peter van Heusden and Wolfgang Maier and Dave Clements and Florian Heyl and Björn Grüning and B{\'{e}}r{\'{e}}nice Batut and}, editor = {Francis Ouellette}, title = {Galaxy Training: A powerful framework for teaching!}, journal = {PLoS Comput Biol} }
You can use Ephemeris's
shed-tools installcommand to install the tools used in this tutorial.shed-tools install [-g GALAXY] [-a API_KEY] -t <(curl https://training.galaxyproject.org/training-material/api/topics/microbiome/tutorials/host-removal/tutorial.json | jq .admin_install_yaml -r)Alternatively you can copy and paste the following YAML
---
install_tool_dependencies: true
install_repository_dependencies: true
install_resolver_dependencies: true
tools:
- name: bowtie2
  owner: devteam
  revisions: d5ceb9f3c25b
  tool_panel_section_label: Mapping
  tool_shed_url: https://toolshed.g2.bx.psu.edu/
- name: multiqc
  owner: iuc
  revisions: 31c42a2c02d3
  tool_panel_section_label: Quality Control
  tool_shed_url: https://toolshed.g2.bx.psu.edu/